Replacing bulbs which have already blown is something which should be covered by your car’s service. If you take your car in for its annual or 6-monthly check up then this is something which a mechanic can do for you as part of the package.
However, if you have only just taken your car in to be serviced, it may seem a bit drastic to pay all of that money for the sake of just one bulb. You will legally need to replace a bulb if it goes out, but there is no reason why you wouldn’t be able to carry out this task yourself. Every car exterior is a different shape: a fact which causes problems when it comes to standardising the position of all of the components beneath the bonnet, including the access points to change the bulbs on your car.
Each car requires its owners to perform slightly different tasks in order to access some of the more tricky areas. The owners’ manual for your particular make and model of car should provide you with all of the information that you need to locate the exact position of your lights from the inside, but here you will find some helpful advice to make the whole process easier.
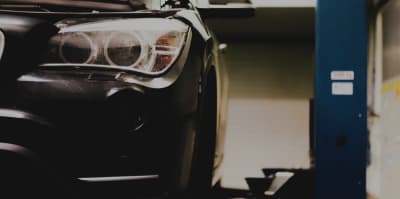
Headlights
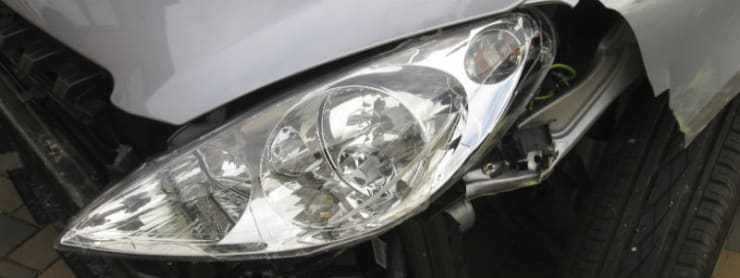
It is usually pretty easy to find out where you need to look to find how to access the bulbs in your headlights. You will need to make sure that the engine is switched off before opening the bonnet. By assessing the position of the headlights externally, you should be able to pinpoint their location underneath the bonnet. It is usually fairly easy to find the compartment you need, and you shouldn’t require any special tools to access the bulbs themselves.
If you do need any specialist equipment, this will be stated in your owners’ manual. Once you have located the bulb you will be able to remove it in order to take it in to a shop to purchase an exact replacement. Headlight bulbs come in many different shapes and sizes and it can often be hard to find the right one if you don’t have an old bulb or your owners’ manual with you.
Be aware that in some newer models of car, one of the headlights might be located under another part of the engine. This may mean that you will need to remove something in order to access the right compartment to change the bulb. If this is the case, make sure that you know exactly what you are doing before you start to remove anything. In this instance it is usually best to let a professional change the bulb for you. There are many larger car parts suppliers which will fit your new bulbs free of charge if you purchase them in their shop.
Sidelights
Your sidelights are in a less prominent position than your headlights and this can make the process of changing the bulbs a bit trickier. Instead of going in through the bonnet, it is often necessary to gain access from behind the wheel arch or from behind the bumper. Your owners’ manual should give you a good idea of where the easiest point of access will be. If you need to gain access from behind the wheel arch then you will need to first turn the wheels as far to one side as they will go. This will open up a gap big enough to reveal the compartment containing the sidelight bulb and should give you enough room to be able to change it.
Indicators Again, exact instructions of how to change your indicator bulbs will depend on the make and model of your car and should be detailed in your owners’ manual. With most models, the process will simply involve removing a few screws holding the plastic lens in place which will give you full access to the bulb itself. Once you have managed to remove the bulb you will be able to take it into your nearest car parts supplier and purchase the right replacement.
Brake Lights, Tail Lights and Reverse Lights
With most makes and models of car, these three lights are stacked one on top of the other and are therefore all accessed in the same, or similar way.
The first thing to do is to check the plastic lens covers for small or hidden screws. If you can see screws on the outside then this is usually a good indicator that you will need to remove the plastic cover in order to gain access to the bulb. If there are no screws then it is very likely that you will need to access the bulbs from inside the car.
Do not try and force the cover off if there is no obvious way of removing it. You could end up shattering the cover which will cost a lot more than the replacement bulb to repair. If there are no screws visible from the outside, open your boot and look for access points from inside. You should be able to easily follow the line of the light back into the car in order to pinpoint its access point. You may need to fold back a piece of fabric lining or unscrew a small door on the inside, but it should be fairly obvious where the access points are.
Once you have managed to locate the bulb you will be able to remove it and use the broken bulb to make sure that you purchase the correct replacement. It is important to remember that having working exterior lights on your car is a legal requirement. It is therefore extremely important to change them as soon as they break. The process is sped up enormously if you know the exact bulb that you need to purchase.
Taking either the broken bulb or your owners’ manual with you when you go to purchase a replacement is the best way to cut down on the time it takes to complete the process. Remember that you can always seek help from a professional and that you should do so immediately if you encounter any problems along the way.
All about Car Servicing and Inspection
- Get your car inspected by a professional today>
- What should I expect when I take my car to be serviced?
- Why it is important to have your car serviced
- What should be included in your car’s service
- What should I do before I take my car to be serviced?
- Tips to Help Your Fuel Last Longer
- How to protect your car from the summer heat
- How to change the bulbs in your car
- How to Change Your Windscreen Wipers and Wiper Blades